This is a little thank you card I did the other day for a friend. We played the game "Imagine if.." the other night at their house with a group of friends and I just wrote a quick thank you note for the evening out.
I started with a blank white card that already had this dry embossed flower on it and I just chalked it and inked the edges. Added torn pp from old world and then heat embossed gold powder on it around the edges. I cut out the lady and the stamp type image and the flower. The blue berry vine is a rub-on ( you can hardly see it) and I stamped the letters/words "Imagine if" and then cut them out. I added the twisted ribbon with glue dots and a brad and then cut off a small piece of some rhinestones in a design flourish package. I think it turned out cute. I think she will love this little card.
January 3, 2009
December 29, 2008
make a flower
http://www.zefrank.com/flowers/ here is a link to a fun little site to make a flower. Once you make your flower you can grow it on a vine and email it a friend if you like. Avery and I just like to make the flowers. It is also a lot of fun to see what others do too! Found this site through stumble upon too!
How cute is this?
Well, not sure how cute you all think this is, but I think Avery is super cute! He looks like he is something out of Alice in Wonderland. All he needs is a couple of antennas! This was a scarf that Morgan bought herself at the secret Santa shop at school. You could actually climb inside it and with Avery being so small she put it on him and he became worm like! I think it would be a great costume for Halloween for a caterpillar! Just had to share because I just thought it was a hoot! Don't you just love the things your children come up with!
Button Trees
These are some button trees I made for small gifts for Christmas. They were really hard to photograph and I think they were much cuter in real life vs. these pics. They are made out of buttons and straight pins on sterofoam cones. The muti-colored one is pattern paper with clear buttons over it (thanks mindy). The white one was my first and I think it could use more buttons, but oh well. I think I will be better at this next year. Although I do think they are really cute. I added glass candle holders to the bottom of my tress for more of a stand and I hot glued them on. Who know how long they will stay on! LOL
Abby Dog
Here is a picture I did in color pencil many years back after loosing my Abby dog. She was my first dog and she lived for I think about 17/18 years, I thought she was 13 years for like 4-5 years!! LOL This is actual 5 different photos of her done in an age progression type series/layout. The top left one is when she was a young pup and as you move around the picture from left to bottom left to right to center to top right she ages with the oldest one being the top right side one. That is more of how she looked prior to loosing her. I did this shortly after she passed. I added the white poppies because I love that flower and did them white because I thought the orange would be too vibrant for the picture and I wanted the main focus to be on her. I only wish I could go and take out the top middle poppy. I just don't like it there, but you just can't go back and erase color pencil. Other than that I love this picture of her and I especially love the bottom right pic of her looking up at me!! She was such a sweet natured doggie and I soo still miss her. Just thought since I posted that painting I would post this. Morgan took this pic with her new camera and I have never really had a good photograph of this drawing.
Tres & Suzanne
This is a watercolor I just did for one of my daughter's girlfriends. She wanted to give it to her mom and dad for a Christmas gift. This is a picture of her and her brother when they were younger. I actually took Tres's head from another picture and added it on this body. They were outside riding their bikes and his face in that pic was too goofy so we found another pic with a face that would fit around the same age and I just added it on to the body. I also matted and framed the picture. The size of the painting was a 16x24. I thought it turned out quite nice considering I despise doing people! :O)
I am not; I am
This lo is for the ETG November BOM Challenge We were suppose to create a layout about yourself and / or your life right now and use at least two of the following journaling prompts in your journaling: I am... I wish... I dream... I am not... I chose I am not and I am - lol like you couldn't figure that one out! This really was a fairly simply lo, I just cut myself out and then cut the flowers out and placed them on the bottom and then the 2 flowers above those and drew and colored my stems. ran my title and crown off the cricut and then typed and cut out my journaling. inked and jeweled my crown and called it finished! journaling reads: I am not for being rude, injustice, extra loud people, foul language, disrespect, stupidity, vengeance, drunk driving, evil, cold rainy days, meanness, stealing, scams, lying, terrorism, cheating, back stabbing, strip bars, rage, hate crimes I am for living fully not foolishly, education, jesus christ, honesty, forgiving, random acts of kindness, different opinions, praying, crying, being silly, unconditional love, respect, cheerfulness, hot bubble baths, goals, dreams, intergrity, lazy days, happiness, hope. (I just realized I have praying twice! LOL.. guess you can never have enough prayer!) oh well! I AM NOT perfect, just look at my crown it certainly is not put on straight! :O) and then in the white writing on my chest... the journaling reads "I am not a princess, but I do like being treated like royality"
For Christy
These are 2 of 3 layouts I did for Christie from Scrapbook.com. The top one I did 2 of so both her sons pages were the same. She lost her 7 year old daughter back in Sept. to a tragic accident. Some of us from the site pitched in and are putting together a 12x12 scrapbook with pages she can fill with her daughter's pictures and also 2 9x9 books, one for each of her sons to remember Chasta by. I hope in time she will be able to enjoy these books. I can't even imagine the the ordeal she has gone through. I hope that these pages came be a small fraction of her and her son's healing process.
YIKES..... my baby's first buzz!!
This is a layout I did of Avery after he's first hair buzz. I swore I would never, ever ever give my little boy a hair buzz... I sooo love hair on little boys, I mean buzzes look cute on other little boys, but on my little boy I always wanted hair! BUT Avery sooo wanted a buzz this past summer and I kept putting him off and finally I could see how truly badly he really wanted one and I gave in. I just about cried afterwards because he looked soo totally different and a little more grown up too. But you can tell by the joy in his face he was delighted with the end result. Good thing no one had a camera on mom, my face was not quite as joyful!! But hair does grow and he now has a full head of hair once again.... who knows what this next summer holds! I made my big bee by paper piecing it and it's face probably looks like mine did after the cut! LOL....
MAIL ART
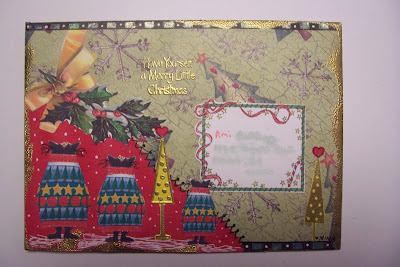
This is all my mail art I did for the Eiffel Tower Group over at Scrapbook.com. We decided that this is what we would send to our group and then enclose either a handmade gift or something 5.00 or under. I did some handmade things which are the crosses and little owls that follow this mail art post. I thought this was a lot of fun and I used a lot of clip art and/or just picture art and cut things out and glued them on and did some doodling and and other things. I used glitter pens a lot too, they were really pretty in real life. I also made cards to match each mail art. This is the front and back of the envelopes and then the card that was enclosed with each mail art.
Subscribe to:
Posts (Atom)