June 6, 2008

This is a layout I did for the "Scrapperlicious" Challenge for the Styles the Word Blog. I actually came in 3rd place! So if you want to see the 1st and 2nd place winners the link to Styles the Word is in my places I like to hang. Check them out they are beautiful and I feel honored to have placed 3rd! Again, this was for the challenge and the challenge was to use some of Irene's techniques. I also did the Unicorn Card that is way below using her techniques.

With this layout I did the stamping on the clear transparency. Irene does a lot of doodling with her white on black which I just love and I did that on my transparency flowers and then the leafy things. I also stamped and heat embossed the big green flower and Irene does a lot of different things to her flowers. Really, if you have not been by Irene's blog please do visit is and tell her I sent you... the link is also in my places I like to hang... and when I go there.. I really hang for quite a while looking and reading!!

There really is a lot of gold heat embossing on this layout, but it did not photograph well enough to see it like it truly is in real life. The tag has it all around the edges and so does the scalloped piece of card stock to the right of the pic on the scallops. This was a supper fun challenge and I would challenge you to go to Irene's blog and try out some of her techniques she gives super instructions. Also check out the "Styles the Word" blog they have some great Designers over there and have lovely stuff to look at and are always doing challenges... so go check out those places, but don't forget to come back and visit me!!

Flowers

There are some different techniques going on with these layered flowers. First I have stamped and gold heat embossed on the green main on. Have I told you how much I love to heat emboss!?! Well, I do. Then I stamped with StazOn Ink which is a fast drying solvent ink on transparency two different type of flowers using foam stamps. Once dried I doodled the white onto the images with my white uniball pen.. which I love. Then I cut the flowers out and added pop-dots between the layers and then added the gold button. Irene does amazing things with transparencies... so give this method a try. It is wonderful and can be used in many different ways.


Doodling, butterflies and hidden journaling

Irene does a lot of white doodling on black, white is very dynamic. I just love the look, so here I made some leaves from tracing a piece of chipboard onto black paper and then cut them out and doodled away. It is a great way to add some paza!

The second picture here shows my tag for hidden journaling. Once again I am a big fan of hidden journaling and you will find that on a lot of my layouts. I gold embossed the edges of this tag and mounted it on black card stock and added a lovely button for the pull.

These butterflies are also stamped with StazOn with just a regular rubber stamp, my stamp just happened to have 3 different size butterflies on it so that was kind of nice and worked well. I just cut them out and bent the wings upward at the body to give them more demension and stuck the on with a mini glue dot. The glue dots seem to work the best with the transparency. I really like the look of these. I think they look very elegant and delicate.

June 4, 2008

Where does the time go?

Wow!! I can't believe it has been a month since I have posted anything on my blog. This month has been soo busy with school coming to an end and with softball season beginning and coming to an end JA! and football season beginning. I have been scrapping and making some things and have just posted some of them. I will be back to post some more in the next few days. HA! I have to laugh because it is not like anyone visits here a lot and would notice!! LOL

Got Mojo?

This is another white space/negative space layout. Like I said, these are a lot harder for me to do then my other layouts. This was a lot of fun and I really did love how it turned out. I first started to scrap lift from Leigh Anne from a digi layout she did, but of course I ALWAYS go with my own way. I really love magic mess you if you have never tried it. Laura a friend of mine started to use this mess stuff on her layouts and I loved it so I invested in some magic mesh. It is real easy to use and lifts off really easy if you feel the need to move it. It adds a nice texture too. With this layout I added a lot of element, stickers, chipboard, ribbon and things I had on hand. I really loved how this turned out. It ended up being a very cool boy page.

This Swing - Est. 1995

This layout is about the swing that we hung in our maple tree way back in 1995. Below this layout you will find layouts of each of my children on the swing. It holds lots of memories and it was something that I thought needed to be photographed and then scrapped along with the children on it. It tells all about just the swing. So, if there is anything like this in your household I encourage you to snap it's picture and scrap it.

"The Swing" layouts - and hidden journaling


These are layouts of my three children. This disk swing has been around for a long time and I have watched each one of my children play on this swing for numerous hours. I have seen them take their first solo flight and have seen many tears shed while learning the social skills of learning to share and take turns. This first layout is my oldest daughter when she was about 3. She is now 17 and still swings on it! The middle layout is my youngest daughter just last summer and the last layout is my youngest son last summer also.


I talk a lot about hidden journaling in the next couple of post on different layouts. On all three of these layout is hidden journaling. On the first one you pull the pink ribbons out of the side of the picture and there is a tage that slides out and there is the journaling. On the second layout the picture on the right side with the ribbon on it lifts up or opens like a book and reveals the hidden journaling. On my son's layout the picture in the bottom left corner does the same thing. When ever I do this kind of hidden journaling I usually just take 2 pieces of the same color cardstock and cut them about 1/2 x 1/2 and the fold them in half and place them on the inside and glue them like hindges. One side onto the matted picture side and the other side onto the layout. Then I usually cute a smaller piece of cardstock or paper that is just a bit smaller then the picture it is going under and glue it in the inside part of the layout to journal on. For the most part the journaling is on the right side when you open the picture up and then I will usually add another picture on the left side inside so I have a hidden picture in there too. Sorry I did not take a photo of that. I promise to the next time I do this and I do it a lot! So if you have never tried hidden journaling, of course, give it a try!


Sweet & Precious


Trim

This trim is found more in the sewing section or purse making or can be found near the beads or iron on kind of things for clothing. I usually buy mine on the clearance section! I thought this was so pretty and girlie and I have used trim like this before on other layouts. So think outside the "scrappy element box" when grazing through the clearance section of craft stores. I usually apply stuff like this with Arleen's tacky glue which holds it really nice and it dries quickly.

For another look to a layout, instead of matting your picture try framing it. For this layout on the smaller pictures I cut a square out of my paper and the cut the edges of my square about 1/4 inch or smaller and then rolled the paper back. I used a small thin paintbrush to roll/curl mine back. This gives it a whole different look than matting.


Eric & Millie


This has got to be one of the simplist layouts I have ever done!! These kind of layouts, believe it or not are soo hard for me. I want to fill up all the space with something, just something! This layout actually consists of 4 different pattern papers, but at first glance you might not realize this. I won't go into a lot of detail with this I am pretty sure you can figure it all out. It is nice to get out of one's comfort zone and try something new and maybe a little hard for you. White space and/or negative space is truly a challenge for me to leave it alone!


A Time to Grow


In this layout I started by first cutting my figures out of my 8x10 picture. This photo had an all white background and I wanted color and I wanted to make it garden like and the white was too white for me for a lo that I wanted to make rich in color. These were Halloween costumes that I made my daughters that year and they turned out so cute I took the to get their pics taken and took my watering can and pot to the studio.
As you can see this has a lot going on. I have on my first layer some stamping going on and doodling. Then I have added cardstock, buttons, flowers for another layer. This was a lot of fun to make and I hope you enjoy it.


Hidden journaling, Stamping, doodling and demension


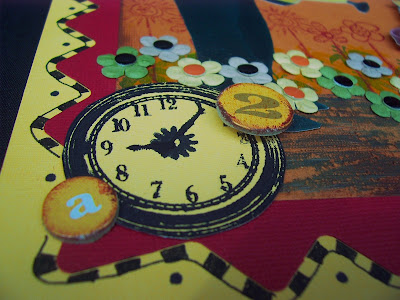
One thing I love is hidden journaling. The row of numbers you see in the second picture from here is just that; hidden journaling. If you pull up, out comes a tag for journaling. You can just about place hidden journaling anywhere. I usually do a lot of it behind the picture. Which in this layout is a tag that pulls out. I also like to hide it book like where you flip the picture up/open and it is hidden underneath. The stamp set is Close to my Heart. The other stamp I have here is in the above picure with the butterflies/clocks and and the clock piece in the layout is stamped also and cut out. See how stamping adds a small piece of the demension along with the cardstock and buttons. I love adding stamping to a lot of different things. Cards, lo's, Artist trading cards. It is a way to help bring demension to things and a different technique that can be quick and easy. Around the edges I doodled which is something I have been doing since I was a child. I even won first place in gradeschool for a doodlly (is that a word? LOL) kind of piece of art work. So I have been doodling a long time. If you have never gave it a try, try starting out on just paper and messing around and once you find a confort level, try it on something you are creating. It's a lot of fun and adds fun to your page too!